Express Payouts
With Express Payouts, you can generate mass Payouts by simply uploading an Excel file containing your payout requests without API integration.
To access the Express Payouts feature, open your Merchant console and expand Payout, then Express Payouts.
Benefits
- Instant Setup without API integration.
- Speedy and Flexible using batch upload.
- Centralize your Payouts with minimum effort.
How to use Express Payouts?
Express Payouts has an easy-to-follow step sequence that allows you to create one or more payouts simultaneously. Once you complete a step, the sequence activates the next to avoid errors.
Next, we describe each step and provide you with instructions.
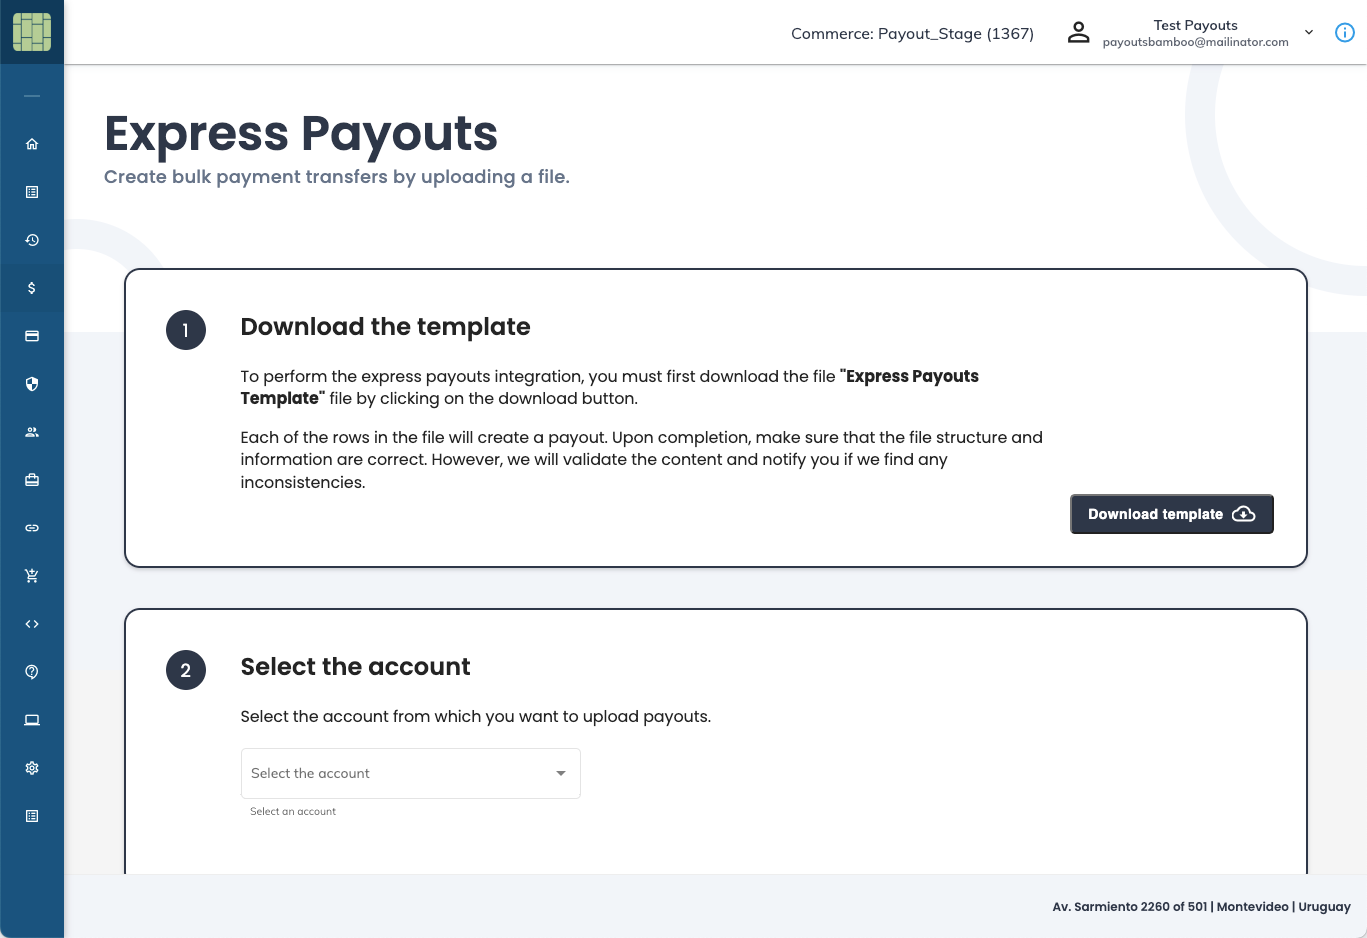
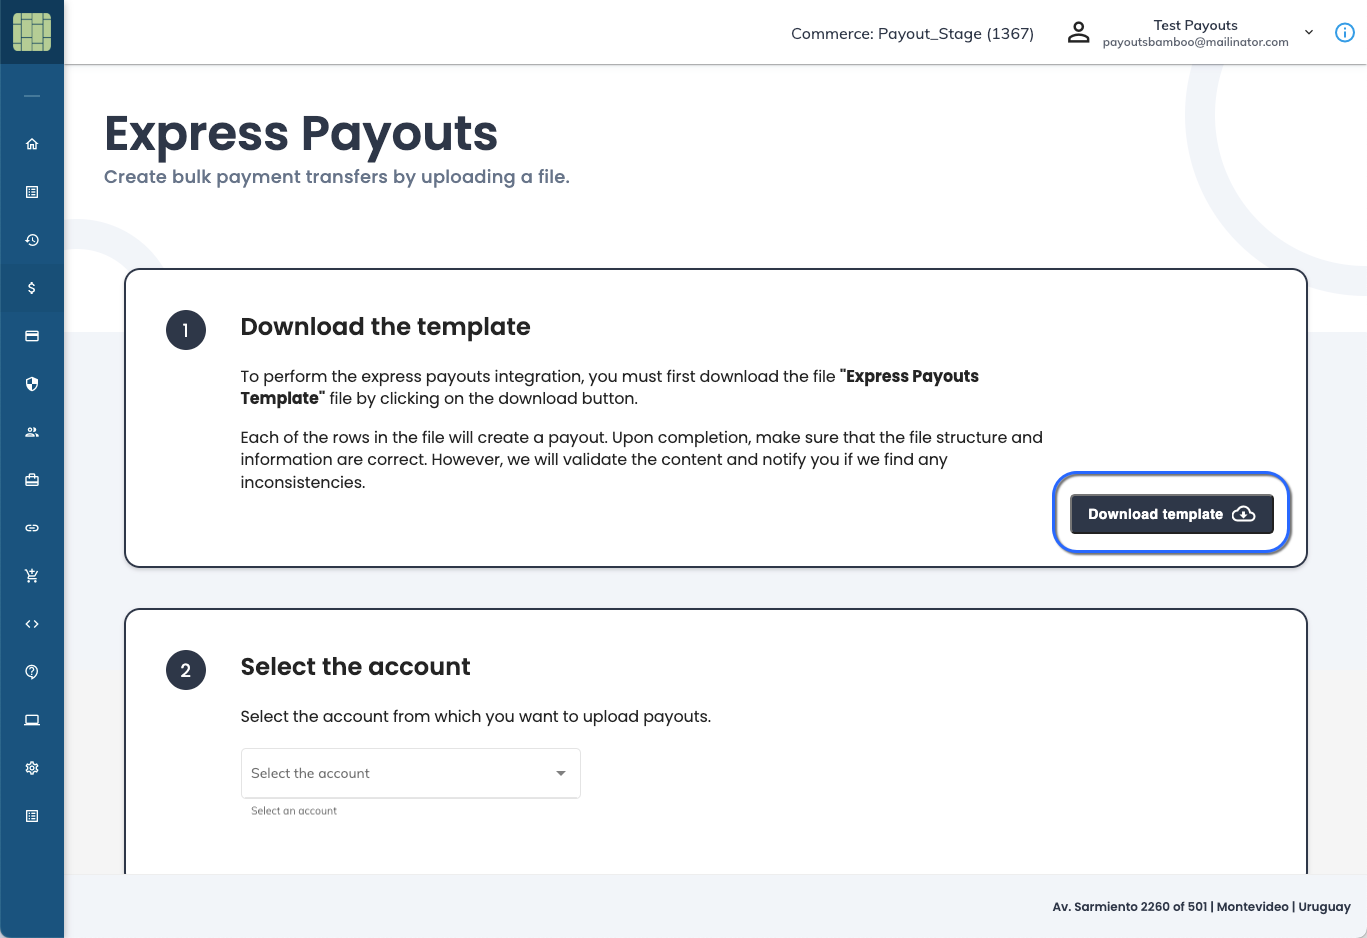
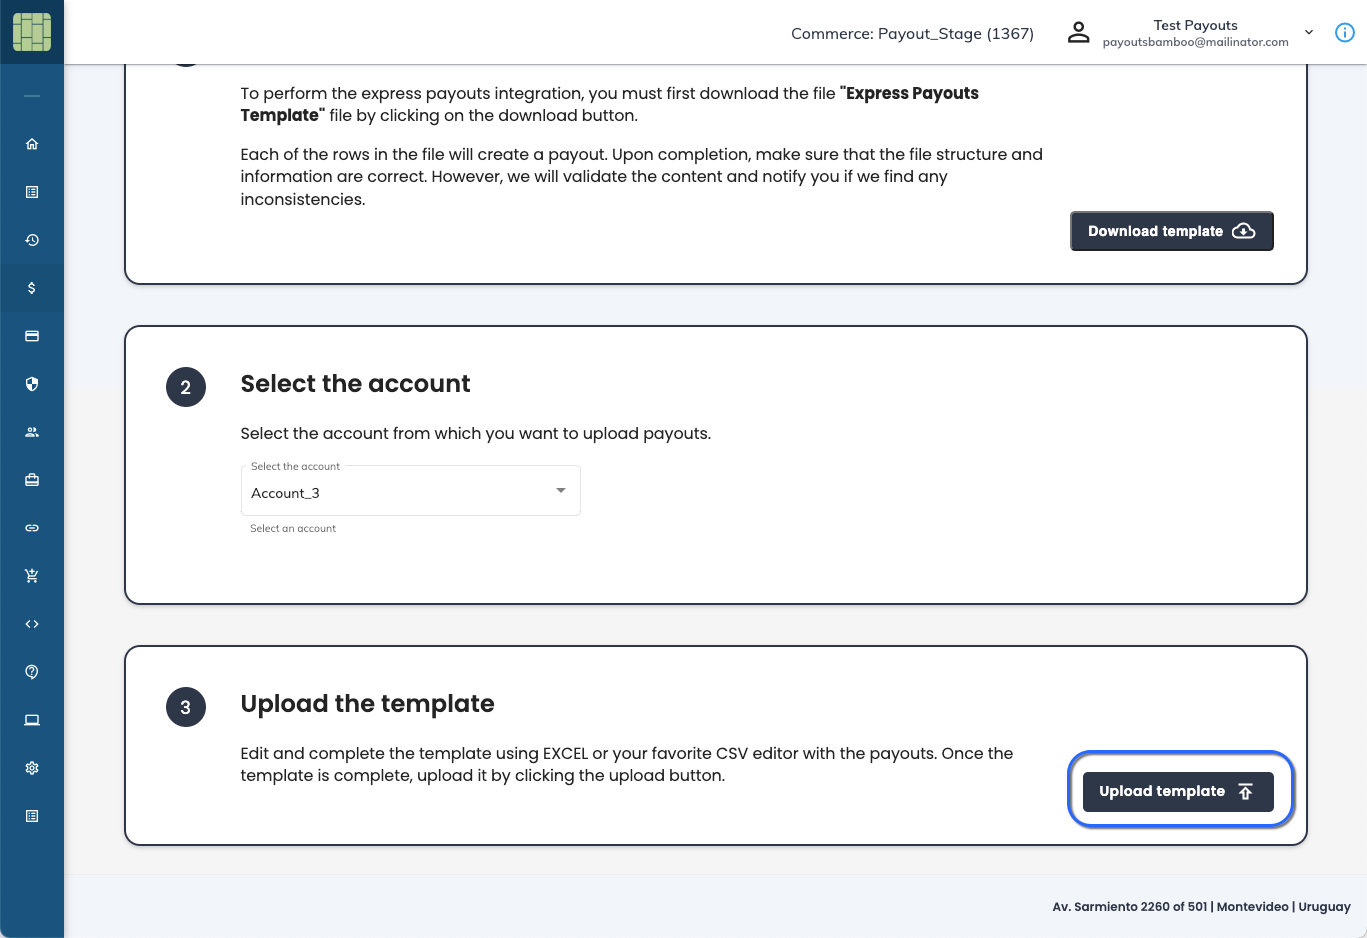
Download the template
The first step is downloading the Express Payouts template. This Excel file has all the information related to a payout and provides examples of how to fill it.
Click the Download template button to get the Excel file.
Once you have the Excel file, you can fill it with the information of the Payouts. Each row represents a new Payout request and has the following columns.
Col | Field | Required? | Description |
|---|---|---|---|
A |
| Yes | Country code in |
B |
| Yes | Amount with two decimals. Example: |
C |
| Yes | Origin currency ISO code. |
D |
| Yes | Destination currency by model (USD2L, USD2USD, L2L). |
E |
| No | Payout description. |
F |
| Yes | Unique ID (cannot be duplicated). |
G |
| Yes | Transfer type. |
H | PaymentCode | Yes5 | Payment purpose code in China. One of the codes listed here must be provided. |
I |
| Yes² | Beneficiary first name. |
J |
| Yes² | Beneficiary last name. |
K |
| Yes² | Company name (if applicable). |
L |
| No | Beneficiary email. |
M |
| No | Beneficiary phone number. |
N |
| No | Date of birth (YYYY-MM-DD). |
O |
| No | Nationality (2-digit ISO code). |
P |
| Yes⁴ | Beneficiary address. |
Q |
| Yes⁴ | City of residence. |
R |
| No | Postal code. |
S |
| Yes | Document type of the Payee. |
T |
| Yes | Document number. |
U |
| Yes¹ | CBU/CVU (AR), CLABE (MX), etc. |
V |
| Yes³ | SWIFT code (international). |
W |
| Yes¹ |
|
X |
| Yes¹ | Bank code. |
Y |
| No | Branch code (required for BR in transfers). |
Z |
| Yes³ | Remitter first name. |
AA |
| Yes³ | Remitter last name. |
AB |
| Yes³ | Remitter company name. |
AC |
| No | Remitter date of birth. |
AD |
| No | Remitter country of residence. |
AE |
| Yes³ | Remitter address. |
AF |
| No | Remitter postal code. |
AG |
| No | Remitter city. |
AH |
| No | Webhook for notifications. |
1 When using Bank Transfers for Argentina, Chile, Colombia, Mexico, Peru, and Uruguay, these parameters are mandatory. For Instant Bank Transfers in Brazil, the payee.bankaccount object and its parameters must not be included in the request. For Bank Transfers to countries that require the bankaccount.Swift field, only bankaccount.number should be completed, and bankaccount.type and bankaccount.codebank must be left empty.
2 The fields firstName and lastName are mandatory for natural persons, and companyName is mandatory for legal entities (companies).
If a payout is sent to a company, only the companyName field must be completed.
If a payout is sent to an individual, only the firstName and lastName fields must be completed.
Important:
- The fields
firstNameandlastNamedo not support numbers or special characters, only letters. - The field
companyNameaccepts all types of alphanumeric characters. - The combined length of the fields
firstNameandlastNameorcompanyNamecannot exceed 35 characters.
3 These fields are required only for bank transfers to the following countries: Bolivia, Bosnia and Herzegovina, Bulgaria, China, Costa Rica, Ecuador, Egypt, El Salvador, Guatemala, Honduras, Israel, Nicaragua, Norway, Panama, Paraguay, the Dominican Republic, and Turkey.
Important:
- The combined length of the fields
Remitter -> firstNameandRemitter -> lastNameorRemitter -> companyNamecannot exceed 35 characters. - The field
Remitter → location → Addresscannot exceed 35 characters.
4 These fields are required only for bank transfers to Egypt.
Important:
- The field
Location → Citycannot exceed 20 characters. - The field
Location → Addresscannot exceed 35 characters.
5 This field is required **ONLY ** for China.
Important Information for Express Payouts
- Do NOT modify the downloaded file by adding new columns, sheets or changing the column names.
- The feature supports a maximum of 1.000 records per file. If you need to include more, repeat the procedure for the remaining payouts.
- If you already have the template downloaded, it is not required to download it again.
- You can save the file using any name of your choice.
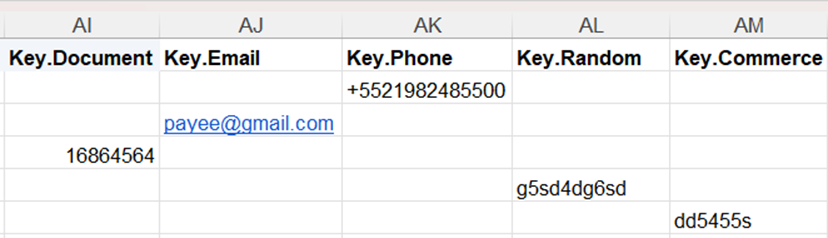
- When using PIX or BREB, it is necessary to set up the beneficiary’s key as explained in the section Additional columns for PIX or BREB.
Additional columns for PIX or BREB
When setting PIX or BREB as the Payout payment type (column Type with the value 4), you must include an additional column according to the beneficiary’s PIX or BREB key. You can configure any of the following columns by adding them next to the Notification_Url column, that is, column AI in the Excel file.
| Col | Field | Required? | Description |
|---|---|---|---|
| AI | Key.Document | Yes* | Add this column to set up the beneficiary’s **CPF/CNPJ **number in **PIX **or the valid document in BREB. The number of digits for **CPF **must be 11, and for **CNPJ **must be 14. |
| AJ | Key.Email | Yes* | Add this column to set up the beneficiary’s email address in PIX or BREB. |
| AK | Key.Phone | Yes* | Add this column to set up the beneficiary’s phone number. For PIX, the number must start with +55, and for BREB, it MUST NOT include +57. The cell must be formatted as text to allow the use of the plus sign. |
| AL | Key.Random | Yes* | Add this column to set up the random key generated by the beneficiary for PIX or BREB. |
| AM | Key.Commerce | Yes* | Add this column to set up the business identifier key for BREB. |
* You must add one column for each different key in your payments. For example, if you have five beneficiaries — one uses an email address, one uses a phone number, one uses a document number, one uses a random key, and one uses a commerce key — you must include the columns as follows:
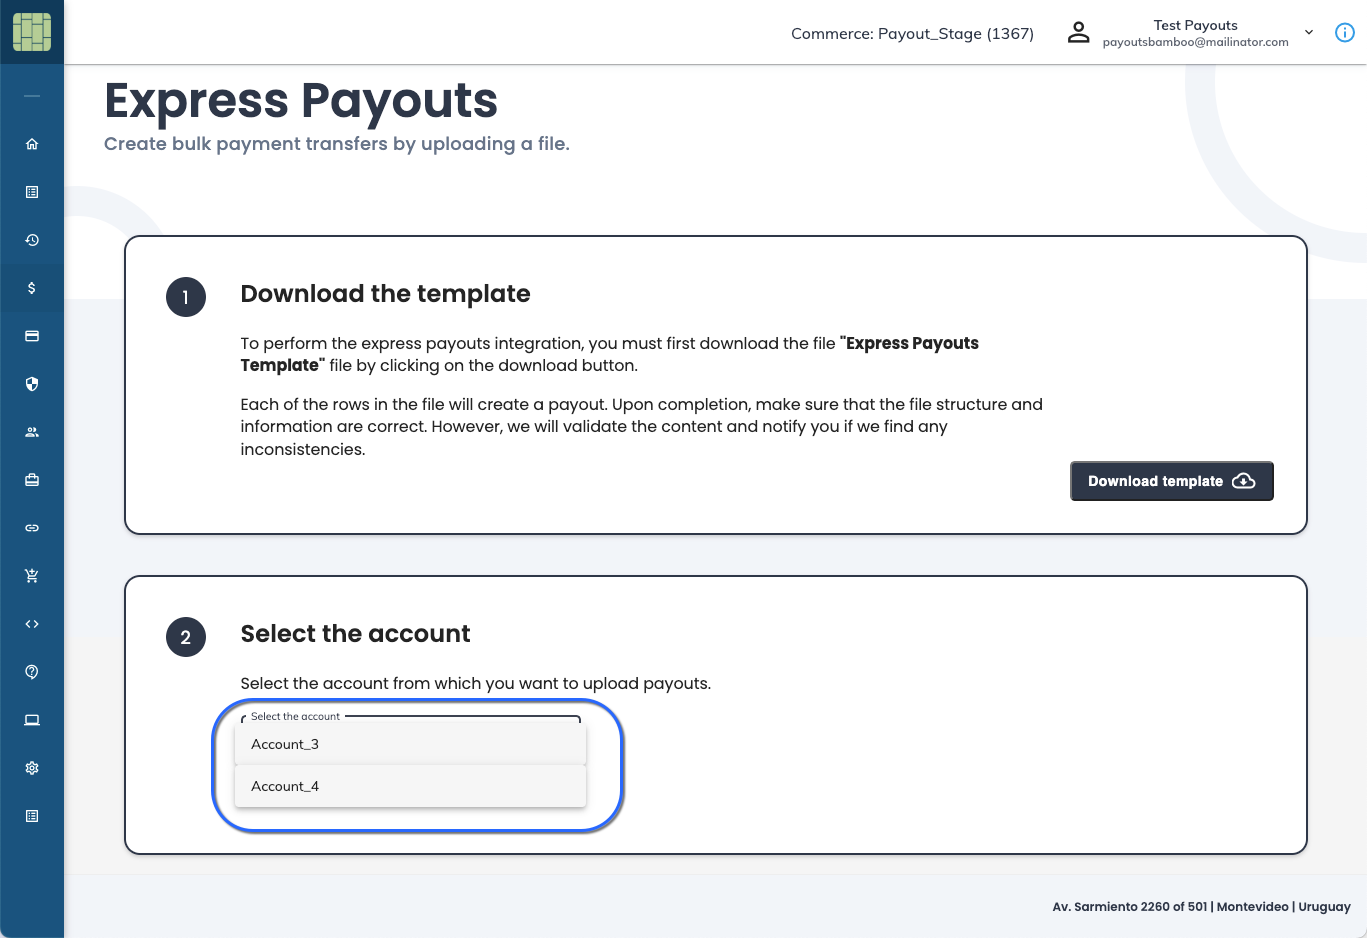
Select the account
The second step involves choosing the account that will debit the Payout amounts. Ensure that the selected account has a sufficient balance to process all payouts.
Open the Select the account dropdown list and select the account you want to use.
Upload the template
Once you select the account in step 2 , the process activates this step. Click the Upload template button to upload the file created in step 1 .
Upload results
If all the Payouts are correct and there were no errors in the file, the system prompts you with the number of Payouts created.

Otherwise, the Express Payouts feature informs the number of successful and failed Payouts. You can consult the error of the failed Payouts in the Excel file we generate using the available link.
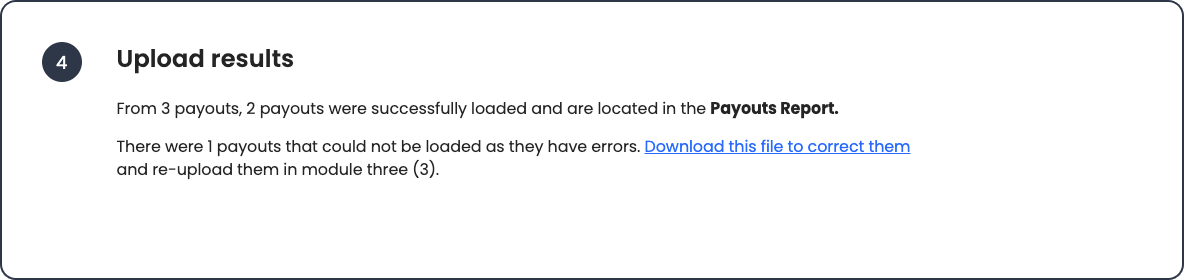
Refer to the last column in the file to know the Payout error.
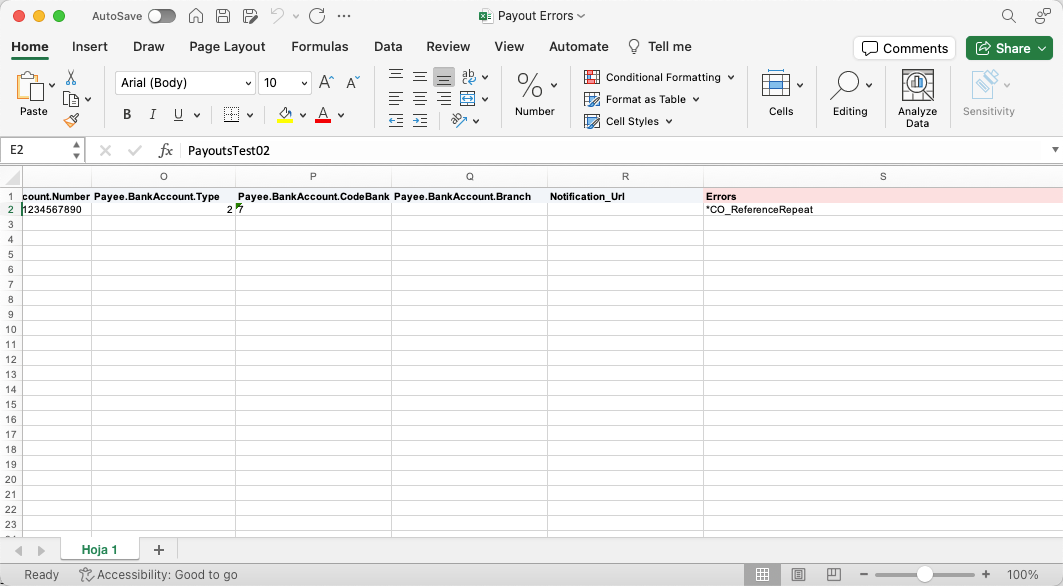
After fixing the error, save the file and upload it using the option in step 3 .
Regardless if the Payout was successful or not, you can consult it in the Payouts Report. Successful Payouts have Pending status and failed Payouts have Declined status.
Updated 5 days ago